Chapter 17.1 The Primary Pouchboard
In my organ, the primary valves had been removed, in an attempt to make the instrument "single action", with the key pallets directly actuating the secondary pouches, as was done in earlier instruments. Since my secondary valves are of the type normally actuated by primaries, I elected to restore the organ to its original configuration. With the organ, I was given a spare primary assembly of the correct type, but it had been stored in such a way that the pouch board had become cracked and warped, requiring me to make a new one. Fortunately the valve board and wind box were intact, although the outside stem guide strips on the bottom were also cracked and split.
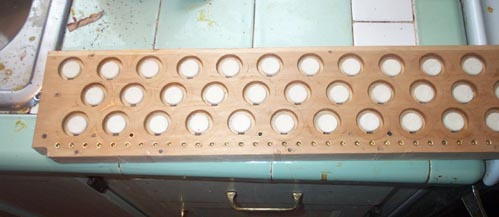
I used one piece of 1/2" poplar drilled for the pouch wells as the top. The old pouchboard served as a drilling template. Another piece of 1/4" poplar was channeled with saw cuts. These pieces were glued together with Yellow Carpenter's glue, and additional coats of Yellow were liberally slopped into the channels to seal the end grain segments between the channels. A third piece of 1/4" poplar was glued on to form the bottom. Then the assembled composite was sawn to size, and a strip of 1/4" glued to one edge to seal the open ends of the channel cuts. When this was all well dried, the pouch-to-channel hole, and the 5/32" holes for the bleed, the 7/32" inlet holes, and the screw holes, were drilled. Again, the old pouchboard served as a drilling template.
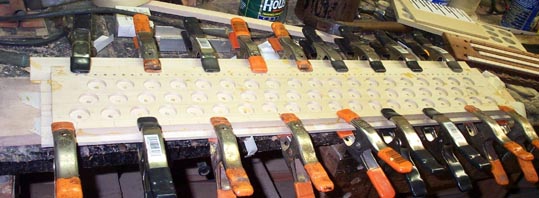
New lower stem guide strips were made, using the matching upper strips as a drilling template. Of course this wiped out the cloth bushings in the old strip, but they were half gone anyway. Then the holes in the upper strip were whiffed out 1/64", and the lower holes were increased by 1/32", to allow for thicker, modern cloth, and for the fact that the stem wires are stepped, with the upper end of a smaller diameter than the wire body. Then all the strips were rebushed in the usual manner.

These valves have a very small seating "ring" area, and they must travel as nearly vertically as possible. I discovered that new stem wires, with two 3/8" leather nuts screwed on with their spherical faces inwards, will center themselves exactly in the approximately 11/64" diameter valve holes. Then the protruding ends of the stem wires will hold the guide strips in exactly the right place for drilling for their support screws. Many of the old strip support spacers were lost or split, so I replaced them with 3/8" long wooden piano plate bushings.
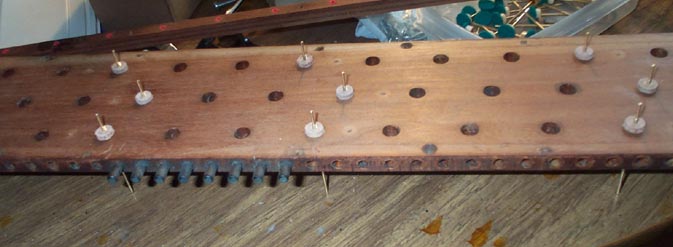
To get uniform pouch dip, I followed the practice used throughout the instrument, of establishing the "bottoming" of the pouches with a punching of pallet felt. At this time, new bleeds were shellacked in.
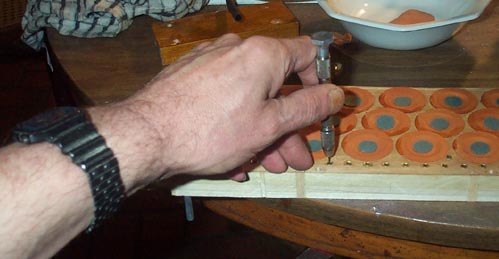
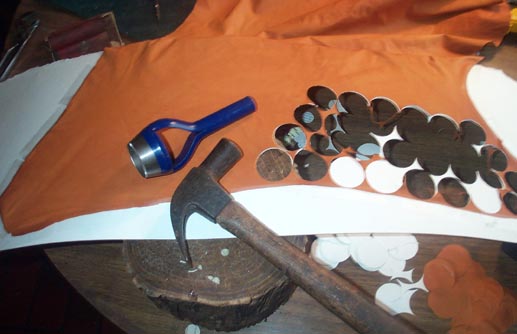
1-1/2" pouches were punched from thinnest pouch leather. I find that it is much easier to punch out pouches, if the leather is stretched flat and stapled around the edges, to a piece of blotting paper. Punching through both the leather and the paper makes the cut cleaner; the pouches come out rounder, and they can easily be spaced close together to save money. The pouches were laid with hot glue, just dripped on around the well with a small brush, and then spread in a circular motion with the finger. Only a thin film of glue is necessary to hold down pouches, and this method keeps the glue off the sides of the well. If the film of glue is shiny, but not smooth like a pool of liquid, it is correct. The pouches were set with a tool made from a 1-1/2" valve disk, with a 3/4" punching of pallet felt on one side, and a drawer knob screwed to the other side. This pressed the pouch firmly and concentrically into the well. Between each pouch setting, go back three pouches and blow hard into the channel with a rubber tube and 7/32" nipple. This inflates the pouch upward, pulling it away from any adhesion to the pouch well wall, and checks that the rim of the pouch is firmly glued to the board face.
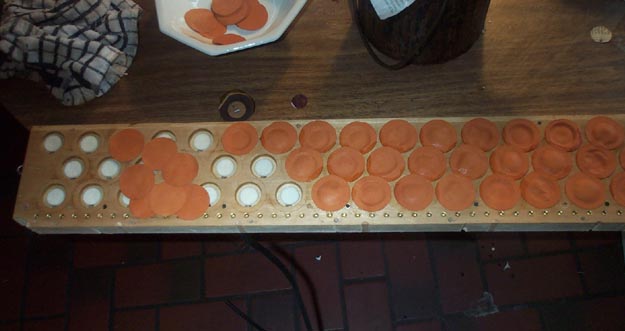
After the glue is fully dry, a 1/2" follower disc punched from 1/64" fiber, is glued to the center. Follower disks should be glued to the pouch only at their center. The easiest way I found to do this is to apply a droplet of glue to the center of the disk with the point of a bamboo skewer dipped into a pool of hot glue dribbled onto the rim of the glue pot with the brush. When the glue is set, inflate the pouch with the rubber tube. The disk should ride flat, atop the spherical inflated pouch, with its edges free all around. If it is tilted, showing that its edge is stuck to the pouch somewhere, pull it off and start over.
Determining the size for the bleed was a problem. The replacement primary I got apparently came from an "X" type Orchestrelle, and its tiny bleeds were sized for the small punchings in 12/inch 116-note rolls. I believe this to be the case, because the seller actually had two similar primary assemblies, alike except that the other one had two rows of similar sized bleeds. On "X" instruments, both 58 note primaries are used for the 116-note rolls; but when 58-note rolls are played on one, the upper primary is turned off. The much larger holes in a 58-note roll need "bigger" bleeds, so the second row of bleeds on the lower primary is uncovered by opening a hinged mute strip. Thus I concluded that 58-note bleeds should have twice the flow capacity of 116-note bleeds. The old 116-note bleeds were approximately #65 (0.0350"), as well as I could measure with wire drills in the original punched green celluloid. This figure is confirmed by Robert Taylor, who has done extensive research on the proper bleed size for 116-note organ rolls. According to the fuel gas orifice table in the "Fisher Regulator Handbook", a #56 (0.0465") hole has just a bit less than twice the capacity of a #65, so that drill is what I used to whiff out the bleed holes.
