Chapter 4.6 - Preparing the Feeder Cloth
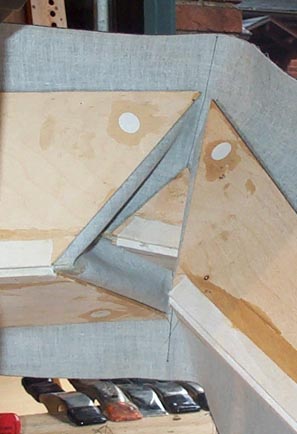
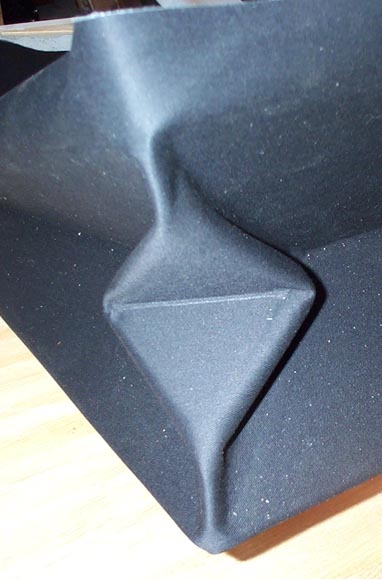
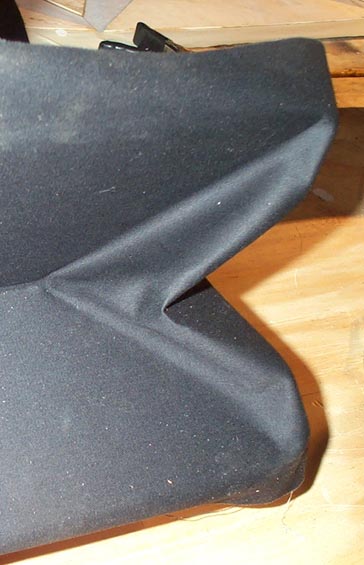
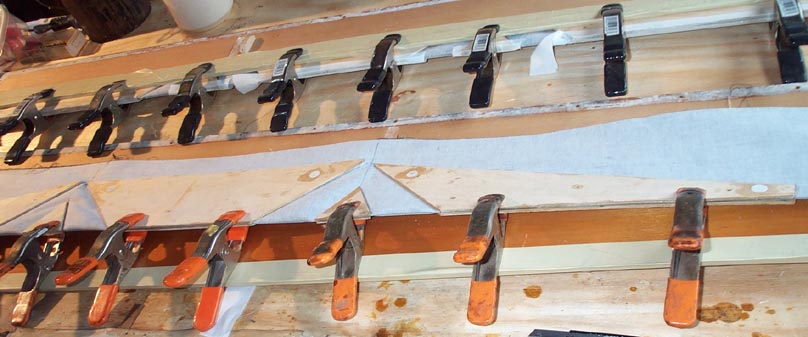
The two feeders in this later model organ are gusseted, but do not have traditional leather corners. Aeolian worked out a means to make a gusseted pressure feeder out of one piece of cloth, a configuration I have never seen before. The secret is two small triangular gussets in the center of each corner, which make the corner bulge out in an orderly way, without wrinkling. Since this arrangement is beyond description, I propped up one of the completed cloth assemblies, and photographed it before it went on to the feeder.
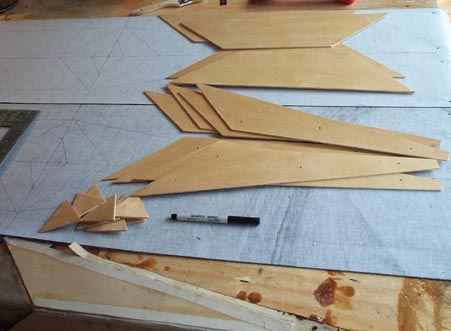
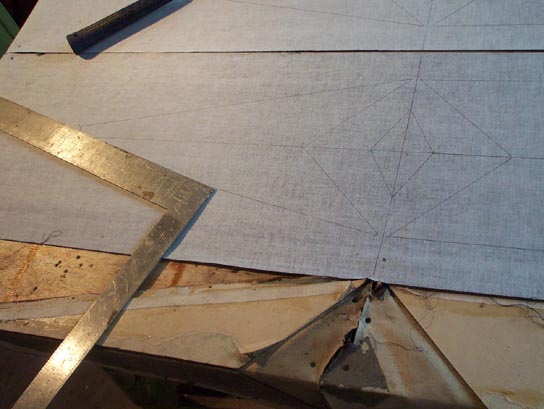
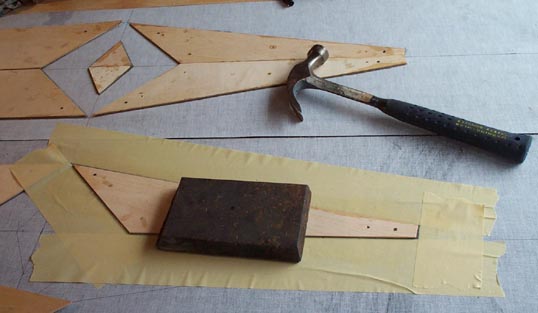
First make the gussets. The originals were 1/8" binder's board (gray cardboard), but my usual source, slit open PVC binders, weren't big enough, so I used 1/8" Finnish plywood. An old gusset, nailed on a stack of rough cut blanks, enabled me to make them all at once on the table saw. The cloth is stretched and tacked to the table, and a line dividing the cloth lengthwise is drawn; this must be very straight, the whole length of the cloth. (A similar line was still visible on the old cloth.) Trace the gusset positions along the line, using the old cloth as a guide,
Glue the gussets to the cloth. Mask and apply glue to the cloth and the gusset, to assure a firm, complete bond. An old reservoir weight holds one piece in place while another area is made ready. Tiny tacks at the corners defeat the tendency for the gusset to warp up at the ends. When masking for the matching lower piece, lap the tape over the inner edge to minimize getting glue on the gusset edge, them quickly pull of this tape. The edges of the matching gusset pieces must touch along the center line.

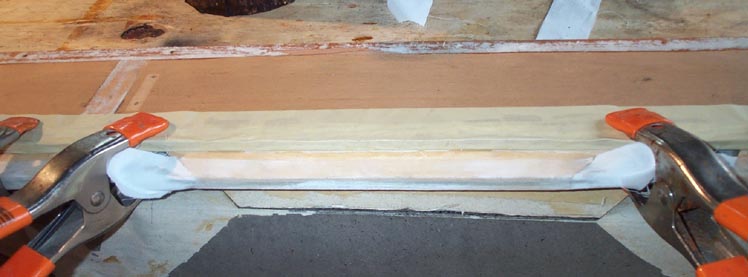
When fully dry, fold the entire cloth along the center line, and patch the tack holes. The folded cloth is firmly clamped in the folded position (Orchestrelle people will recognize rank chest lids; just the right size for clamping boards.) This fold is reinforced with 1-1/2" strips of muslin. One could try to rip these muslin strips, but that didn't work for me. The frayed edges of the strips were too wide and uneven. (The originals were cut, not torn.) These strips are important, to keep the crease in the cloth tight, and to prevent the cloth from separating from the gussets due to its tendency to form a rounded corner.
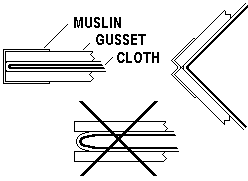
The muslin strip is first glued to one gusset; then the edges of the gussets; and finally to the other side gusset. It must be firmly glued to the edge of the gusset, so that a sharp fold line is maintained at the cloth as shown above.

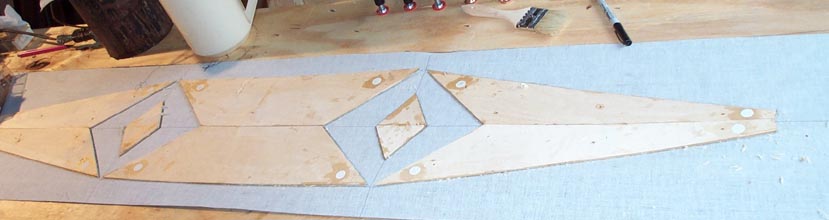
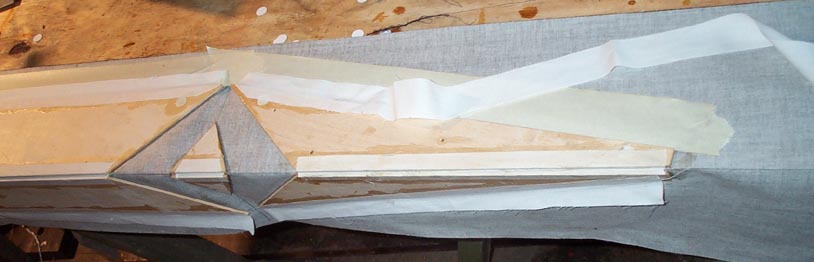
Finally, additional strips of muslin are glued to the edges of the gussets where they will be hinged to the feeder boards. These strips are not glued to the gusset edge at this time, but only to the inside face of the gusset; they serve as aids to correctly attach the cloth to the boards (see next chapter). So mask, and brush the glue away from the edges of the gussets, so glue will not get on these edges.
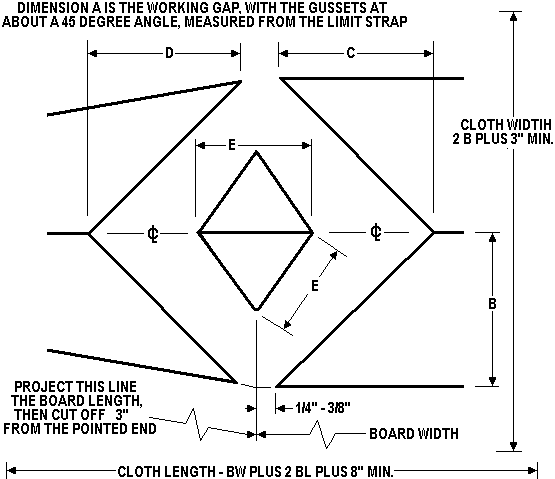
If anybody wants to replicate this bellows style, or replace the cloth in an Orchestrelle that was incorrectly done in the past, here is a drawing showing the key dimensions. The relative percentages in the rightmost column will allow one to make such bellows of any size, keeping the correct proportions.
|
DIMENSION:
|
IN MY ORGAN:
|
% OF A:
|
|
|
Board width
|
|
|
|
|
Board length
|
|
|
|
|
Working gap
|
|
|
|
|
End gusset width
|
|
|
|
|
End gusset cutback
|
|
|
|
|
Side gusset cutback
|
|
|
|
|
Triangle side
|
|
|
|