Chapter 12.1 - Cleaning and Assembling the Keyboard
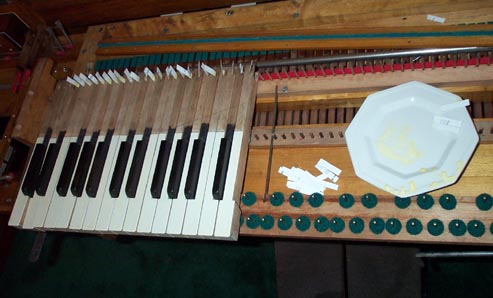
The next item on the keybed is the key frame and keys. The key frame is like any other American reed organ. The frame itself was washed to remove all the accumulated dirt and old glue.
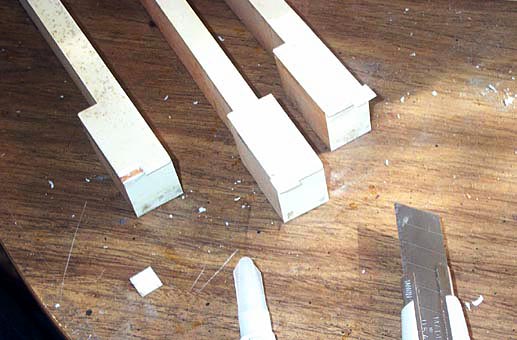
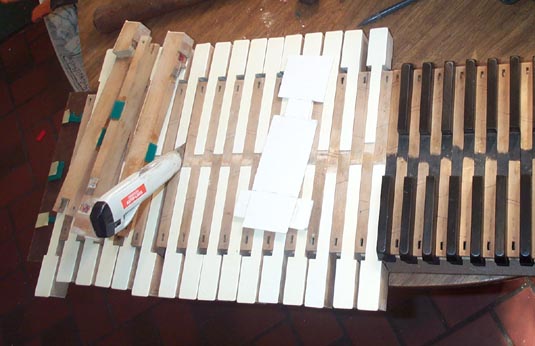
The celluloid covered keys were in pretty good condition, but three of them had chipped fronts. These were mended by cutting off a bit of celluloid from the rear of the key, hidden by the nameboard felt. The bad part was cut out, leaving the removed place with sloping sides around the cut. The extra bit was cut into a square with matching sloping sides, and glued into place with super glue. Then the patch was shaped with a fine single cut file.
The sides of the white keys were black and dirty,
as is always the case on an old keyboard. I like a nice, new looking
wooden core on the keys, but i hate to see a refurbished keyboard where
the sides of the keys have been sanded; the gaps appear too wide.
So I figured out a way to remove the black dirt without sanding.
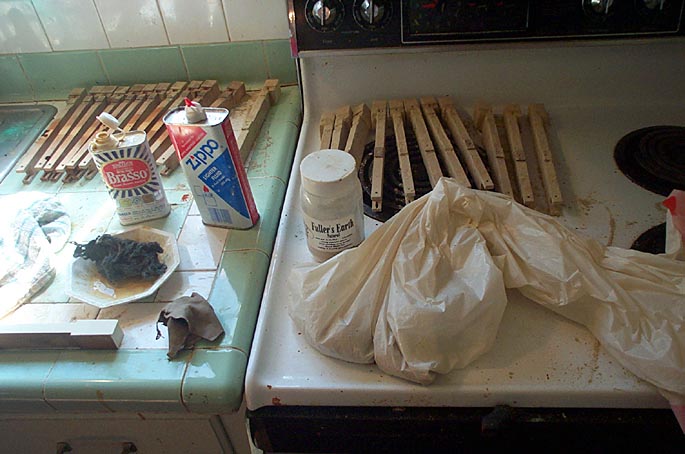
First the celluloid surfaces were cleaned up with Brasso and fine steel
wool, then buffed with a soft cloth. This removed the "yellow", and
all the foxed spots. Then the wooden sides were cleaned by first
saturating them with gasoline (lighter fluid). This softens and dissolves
the dirt. Then the wet keys were shaken in a bag containing fine
fuller's earth, just like flouring a chicken for frying. The super
absorbent fuller's earth draws out the solution of dirt and old furniture
polish, leaving the wood clean and new looking, after two applications
of this process. This primitive but effective cleaning process has
been used for centuries by fullers, the people who make "fulled" or felt
surfaced woolen cloth like billiard or bushing cloth. After they
raised a nap of wool by scraping, they pounded or rolled this into a felt
layer that fills the interstices of the weave. But for felting to
work, the fibers have to be lubricated, traditionally with sheep fat, which
subsequently has to be removed by absorption. (Most people capitalize
fuller's earth, but his is wrong; there was no guy named Fuller.
The name is lower case, just like plumber's friend or carpenter's square.)
Fine fuller's earth can be had on-line from The Cineshop,
a theatrical supply house, of all places; the coarse fuller's earth sold
as cat litter or garage floor cleaner won't work.
The sharps were made of either real ebony, or a
damn good substitute, so they were all black, even the worn edge of the
middle B-flat. So they only got a couple of coats of Behlan's "PadLac"
polishing varnish. I don't like shiny, garish looking sharps that
have been spray painted with commercial "sharp refinisher".
A strip of new thin green action cloth is glued to the center of the keys where the pallet stick touches. A cardboard template enabled me to mark the sides of the keys where the strip went.
I decided not to rebush the front rail pin slots. It is surprisingly difficult to get new bushings just right, and it wasn't necessary. The front rail pins are the higher quality oval kind, rare in a reed organ. They had all been turned "northeast", wearing the bushings at the one o'clock and seven o'clock positions. By turning the pins to the "northwest", their edges bore on brand new spots on the bushing, at the eleven o'clock and five o'clock positions. The keys are installed, first the sharps and then the naturals, rotating the pins with the smallest notch on the capstan wrench, to get a smooth, slop free fit. At the same time, the keys were given a preliminary "straightening up" by bending the rear pins left or right with a key spacing tool.
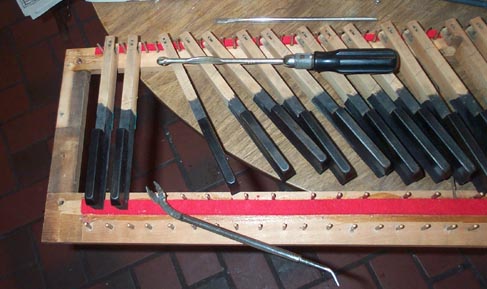
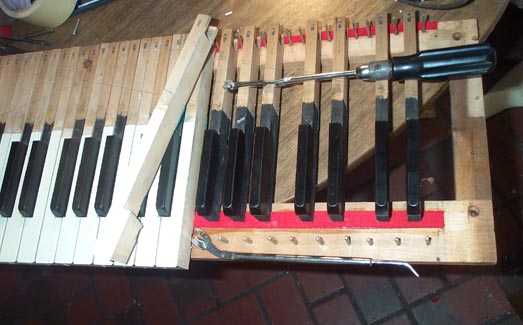
I discovered that the unbushed rear guide pin slots had become worn large, allowing many of the keys to have a rotary wobble, and not stand up straight. strips of business cards glued into the slots cured this. Some of the slots required as many as three strips of card to bring the slots into a good fit. The pictures above show a strip of felt to stop the pushed down keys. This was the way the keyboard was done originally. I tried different materials, but action cloth felt too hard and was noisy, and the felt I had was too soft for a good feel. Also, the key dip could not have been easily adjusted. The use of a single strip of felt here, although common in reed organs, is theoretically wrong. Since organ keys swing around one line at the back, unlike a piano with its staggered center pins, the key dip for the shorter sharps ends up smaller than for the white keys if the stop point is on one common line. So the felt came off, and regular front rail punchings were installed in its place. This picture also shows the fixing rail, upside down at the top. The organ came with no cloth or felt on the lower lip of the rail's edge that bears on the projection on the rear end of the key. This made no sense, and the keys made a rattling noise where wood touched wood. Some remnants of glue on the rail suggested that there had been something here at one time, so I put on a strip of thin green billiard cloth. This point is critical in establishing the level of the keys. The soft red felt below the keys at the rear just serves to push the back ends of all the keys up against this point.