Chapter 14.2 - Trimming The Stopboard
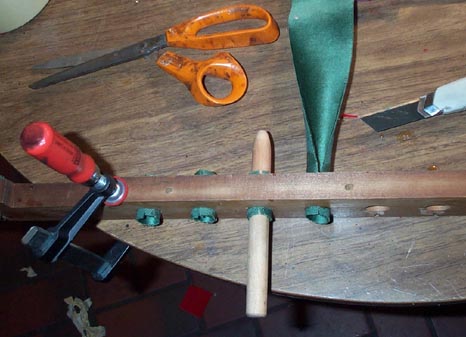
The bushings for the stop rods on the rear board are critical. Because of the high upward force of the pallet flipping spring, there is a lot of friction here. I tried several grades of felt and cloth. but the smoothest running material i found was some old canvas backed green plush, originally purchased for covering a gramophone turntable. A 5/8" dowel with a smoothly tapered tip was made to help mold these large bushings to the holes.
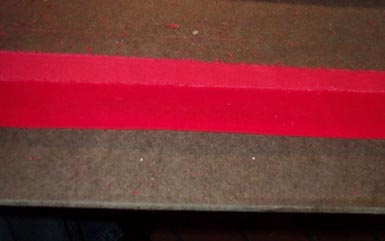
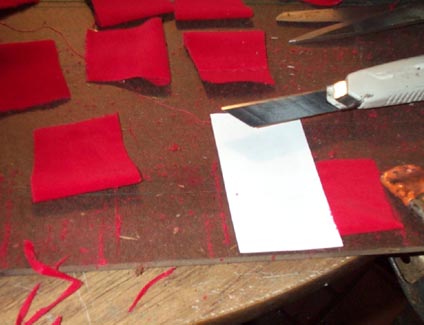
As an organ traditionalist, I like a nice chubby, soft rolled velvet bushing around the front holes in a stop board. Also, all my stock of felts and cloth was too light a shade of red to match the original. After several false starts, the following method was developed. First rip a strip of the correct color velvet from JoAnn Fabrics, about 3" wide. Mask all but the lower 3/8" of the back of the strip with a piece of paper, and spray on a heavy coat of Spray Mount adhesive. While this is still wet, turn over the sprayed edge half way. Since the adhesive does not go all the way to the fold line, the hem formed is hollow and flexible at the edge. This is cut to the correct width, and the cut edges are dipped into a pool of Spray Mount to prevent fraying. Make a bunch of extras; a lot are spoiled during the installation.
To insert them into the holes, first tape the back edge of the piece to a stop rod with Scotch tape. Being only one layer thick, this will go through the hole easily. Loop the end of the tape so it is easily grasped and can be pulled off easily. With a small brush, paint hot glue all around the first joint of your little finger, and roll your finger around the insides of the hole. Wipe away any glue that might have got on the front of the board with the thumb; it won't stick to the waxed surface of the board. quickly insert the stop rod part way, and check from below that the gap in the bushing is at the bottom center. Then push the rod in further, until about 3/16" of the hem is showing
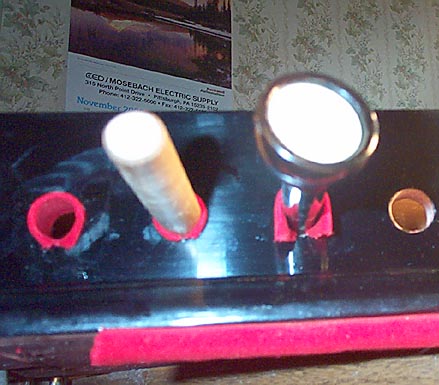
The thin layer of glue sets quickly, so one must work quickly. Reach it behind the board, and pull off the tape. Insert the stick, and using it to keep the whole bushing from being pulled out, gently but firmly tug any part of the cloth from behind while the glue is still soft, to get the hem protruding equally all around. Usually the lower corners have to be pulled in a little. Finish by wobbling the stick around in the hole, to force the cloth against all sides. It doesn't matter that there is a v-shaped gap in the bottom of the bushing; it can't be seen when the stop rod is in place.
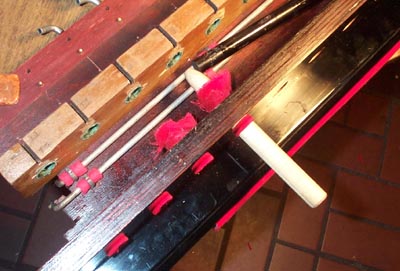
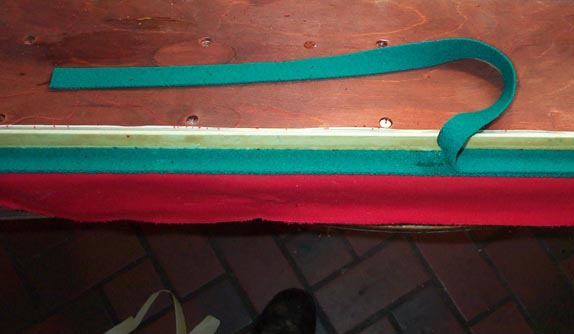
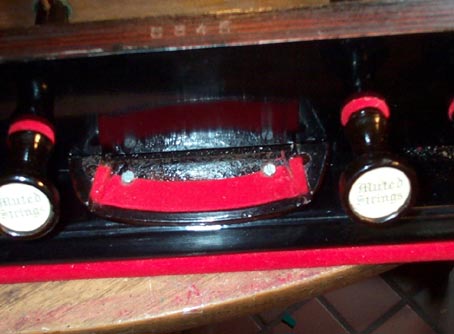
The gap between the bottom of the stop shelf, and the top of the keys, is about 1/4". Ordinary name board felt can not fill this big gap, but it must be filled with something rather firm. The front rail pins don't go very far into the slots in the keys, and the keys can not be allowed to jump up above their rest positions, or they will pop off the pins. At the same time, the name board trim cant be allowed to push down on the keys. On the original, a piece of red bushing cloth, about 1/8" thick (something not available anymore) was glued on; doubled over into a big round fold, and tacked on at the back. By trial and error, it was determined that two layers of velvet, one layer of thin green action cloth, and one layer of thick green action cloth, formed a "pack' of just the right thickness. To make sure the edge of the composite was perfectly straight, a gluing guide was established. A length of 3/4" x 3/4" x 1/8" aluminum angle was "hooked" over the front edge of the board, and a line was scribed along its rear side; this line thus being 5/8" from the forward edge. Then the angle was masked, and screwed onto the board with the corner along the scribed line. This made a sort of fence; anything 3/4" wide, glued up against it, will end up protruding 1/8" in front of the board edge. Cut the two strips of action cloth accurately to 3/4" width by clamping a piece of 3/4" aluminum bar to the cutting board on top of the stock. and cutting along both sides with a new snapknife blade. Tear a 4" strip of velvet, and glue one edge, face down, to the bottom of the board, up against the stop fence. The very edge of the board is masked while the glue is brushed on, and then quickly ripped off before the velvet is attached. This keeps any glue from getting on the finished edge of the board.
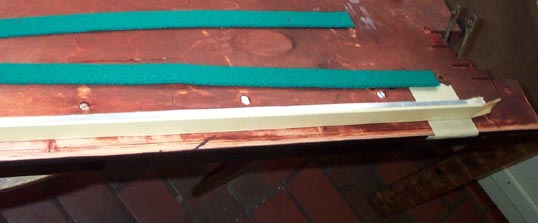

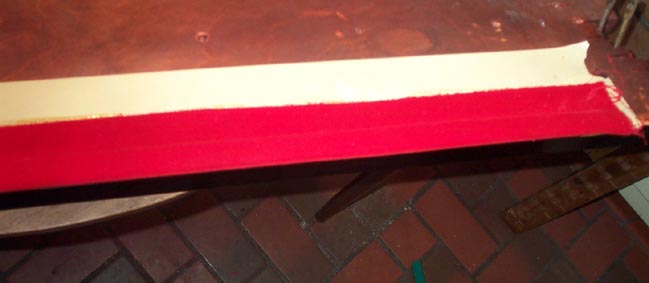
Then glue the two strips of action cloth on with just a narrow streak of glue. Guide their back edges firmly along the stop fence, so their front edges form a very straight line 1/18" in front of the stop board.
Remove the guide bar and mask about 1-5/8" behind the front edge of the strips. Lap the free edge of the velvet up and over, and glue it to the board, forming the "roll". Work a little at a time, carefully pulling the velvet just tight enough to form a nice rounded and even :"hem". When that is set, trim along the edge of the masking tape, and pull of the tape, along with the excess cloth and glue.
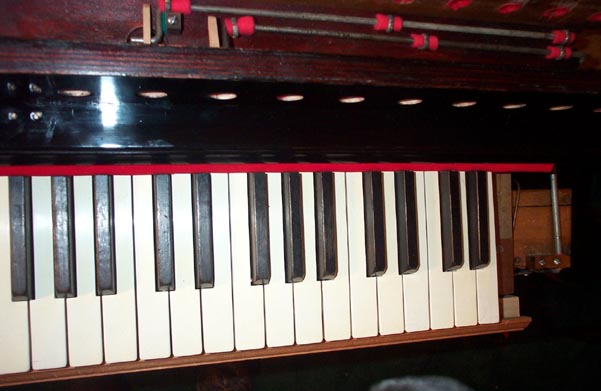
A trial fit up shows that the rolled edge just clears the back ends of the sharps, and that the roll does not push down on any of the keys. Then the ends of the roll are trimmed off. I left them about 1/2" beyond the ends of the keys for now. They will be finally trimmed to length when the cheek blocks are installed.

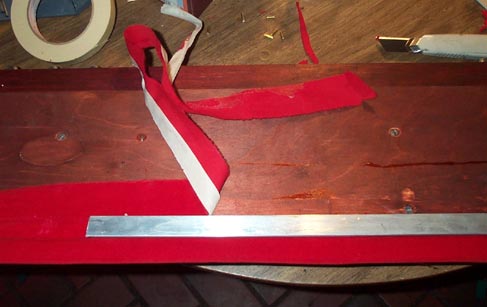
The tempo indicator guide block, and the ends of the stopboards, are trimmed with red velvet, glued with Spray Mount and folded. To make it possible to turn the trim roll around a sharp corner, don't just notch the strip 45°; punch a 3/16" hole about 1/16" away from the turned edge, then make 45° cuts up to the edges of this hole. The little bit of hem above the punched hole will then turn sharply around the corner without bulging. Actually, bushing the edges of the stop board is an utter fake here. Stop board edges in pipe organs are traditionally bushed, so that the cheeks of the organ will not be scratched when the stop board is folded up for maintenance. But this stop board doesn't fold up. Of course, the stop boards in Aeolian pipe organs don't fold up either, but they are bushed too; I guess tradition governed here.
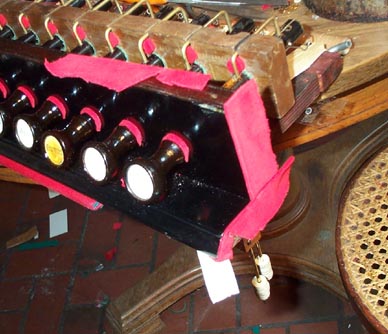
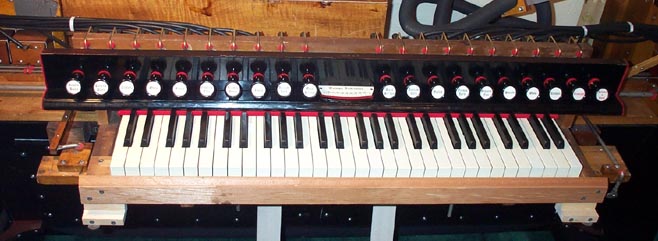
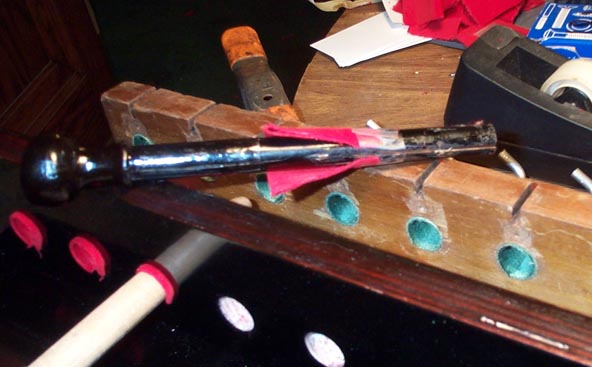
The front ends of the stop rods and knobs were "renewed" by first filling in the scratches and chipped edges with black marker. Then the labels were masked with Avery 1" round gummed stickers, and the rods were dipped in shellac, shaken off, and allowed to dry. Two coats of this treatment made them nice and shiny. Many of the stop labels were faded, stained or had the color chipped out of the hot stamped printing. New stop labels were made in Visio, using Word Art to size the lettering properly. The circle around the text was made slightly larger than the final 7/8" diameter, and is only a guide; it won't appear on the final result. The resultant image was printed on ivory acid free paper. I don't have a color printer, so the two "mechanical" stop faces; "Tremolo" and "Pneumatic to Manual" that were originally printed in red, were taken to Kinko's and copied in red on my paper, using the color laser printer.

The printouts were glued to sheets of blank. permanent adhesive Avery label stock, using Spray Mount liberally applied to both surfaces and joined while still wet. Spray Mount used like this works like contact cement, forming a permanent bond that won't come undone, and won't curl the paper while drying. When this dried, the label texts were covered with transparent 2" packaging tape, forming a shiny and durable surface. The stop "stickers" were punched out using a 7/8" punch, guided by the printed circles. After the stops were finally installed with their guide wires, the old faces were cleaned with lighter fluid, and the new label stickers were applied. A piece of paper, accurately cut and folded to a 2" lap, secured under the keys, serves as a horizontal reference line, to help the labels go on straight. In a like manner, a new tempo indicator scale was made to replace the old one whose printing had partly come off. Don't complain about historical ethics here; all the old hot stamped celluloid labels are still there, under the stickers, in case anyone in the future can figure out how to make them look nice. I used a good quality sticky paper, but it will come off with lighter fluid, leaving no trace.
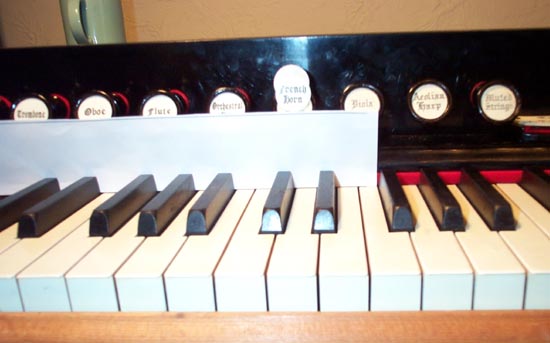
Here is the final result.