 Mechanical
Music Digest™ Mechanical
Music Digest™ |
| You Are Not Logged In | Login/Get New Account |
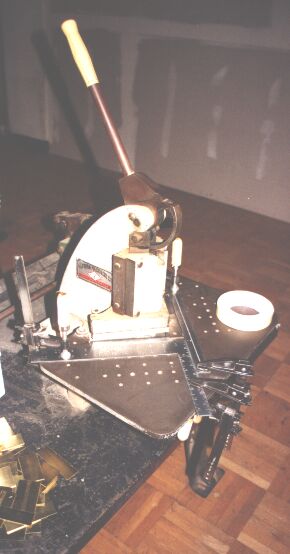
|
Please Log In. Accounts are free!
Logged In users are granted additional features including a more current version of the Archives and a simplified process for submitting articles. |
|
|
MMD
|
|
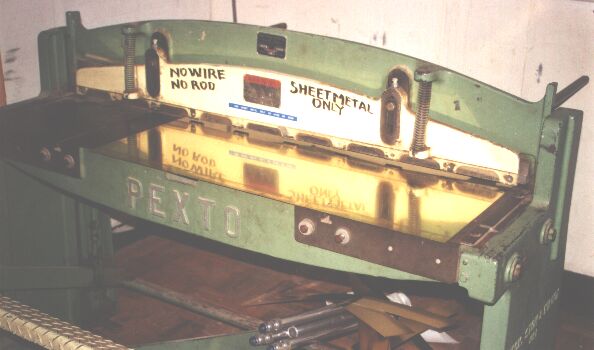
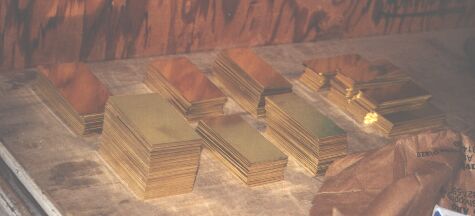
by Marc Elbasani (010929 MMDigest) This is how I make harmonic freins. 1. Buy a big sheet of brass from a metal supply place. There are generally one or two such places per large city. Purchasing a large sheet will help to reduce cost, although transportation can be tricky. Have them cut the large standard sized sheet down to panels of roughly 3 by 3 feet. A good sheet metal distributor will pack your sheets between two panels of plywood, thus preventing any bending or scratching to them. 2. Take your sheets and cut them into long strips on a foot-operated shear, much like the one you see in the first photograph. You should cut these strips such that their width is equivalent to the length of the freins you will be making. Note that just about every foot shear or metal shear out there will have some sort of adjustable referencing system so that this cutting process is a fast and uniform operation. 3. One you have cut the strips of metal, reset the shears referencing system to whatever the greatest width of your freins will be. The width you are accounting for is the span of the top edge or 'head' of the frein. Insert the strips lengthwise into the foot shear and proceed to cut out the rectangles. If all is well, you will have a nice pile of rectangles waiting to be turned into the T-shapes that will be your freins. 4. Now you move onto the corner shear. The corner shear is designed to cut squares out of sheet metal. Using an assembly of clamps, a steel straight edge and carpenter's square, set up a jig system that will allow you to cut out the portions of the metal that will leave you with your T-shape. 5. Understand that, in order to set the jig up right, the straight edge must be parallel to one edge of the corner shear and spaced away from that cutting edge at exactly the height of your frein head. Once you clamp the straight edge down, you will not move it at all for the duration of this program. It must stay in place. 6. Place the carpenter's square against the straight edge such that it cuts out a rectangle of metal from one side of the larger rectangle that you insert. This will leave you with an 'L' shapes piece of brass. Cut out a series of these. Remember that you will have to account for your stem width. 7. Unclamp the carpenter's square. You must now re-clamp the carpenter's square so that it is spaced away from the cutting edge perpendicular to the edge running parallel to your straight edge. This space should be equivalent to the width of your frein stems. 8. You will now be punching out the second smaller rectangle from your larger rectangles, thus leaving you with your T-shapes. Remember that you are now flipping over your "L" shapes to create a mirror image of the cut describes in step 6. By having kept your straight edge in place, you have made sure that your freins head heights are identical. 10. Punching out your holes can be done with the Whitney Roper hand punch, specifically, the No. 5 Junior punch, which is currently for sale at http://www.roperwhitney.com/ End of process This process will leave you with freins of rotational symmetry. Rotational symmetry is characteristic of my freins, and perhaps yours, should you desire to make your own in this fashion. After having mass produced these freins to the point where my inventory is several thousand freins, I can assure you that this system is fast and efficient. In my last production run, I stamped out 1500 freins in one night. You can do it too. Disclaimer: I work on these from 10 PM to 6 AM. I'm an architecture student, see. If there are any questions regarding this or any previously described steps, please feel free to contact me at <kushpo@vdn.com> Warmest regards,
02 October 2001 |

|
|
|
|
|
|
|
|
|
CONTACT FORM: Click HERE to write to the editor, or to post a message about Mechanical Musical Instruments to the MMD Unless otherwise noted, all opinions are those of the individual authors and may not represent those of the editors. Compilation copyright 1995-2026 by Jody Kravitz. Please read our Republication Policy before copying information from or creating links to this web site. Click HERE to contact the webmaster regarding problems with the website. |
|
|
||||||
|