Chapter 13.2 - Releathering and Testing the Touchbox
The pallets were removed and carefully washed with PineSol, to try to remove the grease that someone had put into the grooves. Also, this took the leather off, without sanding. Only an occasional light scrape with the razor blade was needed to smooth down the grain that was raised by the washing.
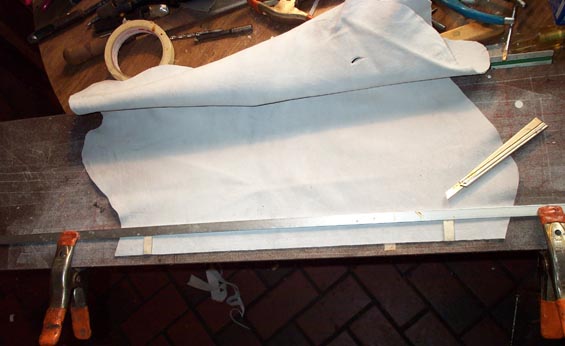
These pallets were covered with leather only, with no felt backing. I selected Leather Supply House thick goat as the best match. Unlike all the rest of the pallets in the organ, the red felt heel rest pad was a strip of very thin red felt glued directly to the seating surface without a gluing stick. This was not moth eaten, and was reused. But the leather selected had to be thicker than the heel rest pad, so the pallet would lie flat against the seating surface when closed. The pallets were releathered in the usual way. During the gluing, another strip of leather was used to support the rear ends of the pallets.
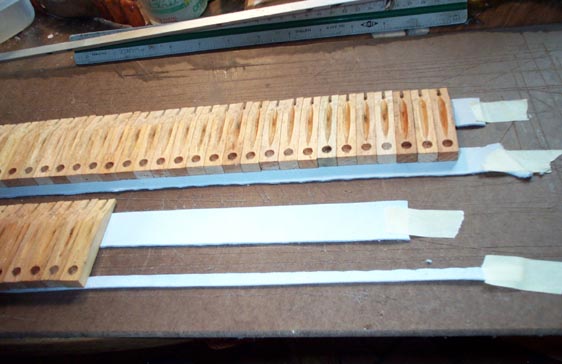
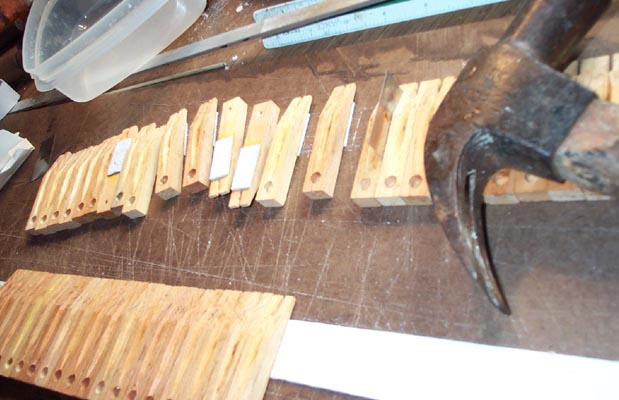
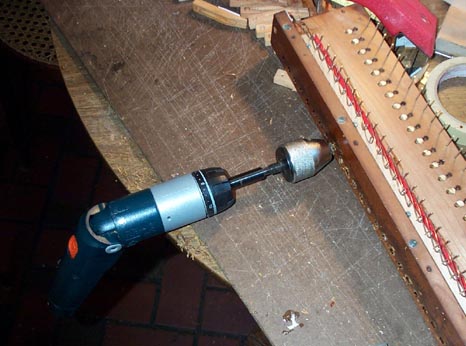
The shellac was whiffed out of the elbow hole with a 7/32" drill, so the new elbows would fit easily, and the hole blown clean. A note here about the nipples and elbows in this instrument. Unlike on their player pianos, Aeolian used some cheap, very thin walled elbows and nipples here. (All the tubing except for the tracker bar connectors is 7/32") Many of these were poorly bent and kinked, corroded through, or broken off. I would have rather not used new ones, but I had no choice. Player Piano Company #6 - 7/32" tubing, #143 - 7/32" elbows, and #73 - 7/32" nipples were ordered. As each pallet was installed, ti was preliminarily tested by sucking on a tube stuck into the elbow hole.
The pallet springs were all bent crooked, and had different deflections. Some were too loose to hold the pallet closed reliably, and provide a snappy return of the stick when actuated with the finger. I developed a technique to bend the springs anew, so that they all came out the same shape, and all had a reliable closing force. It doesn't seem to matter what the magnitude of this force is, as long as it closes the pallet reliably, and is reasonably the same for all 58 places.

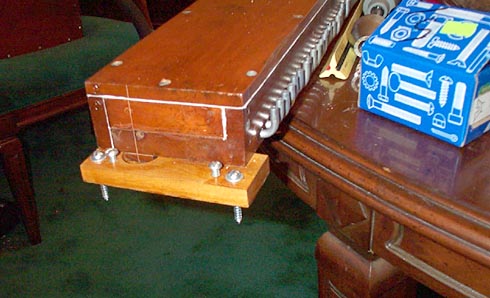
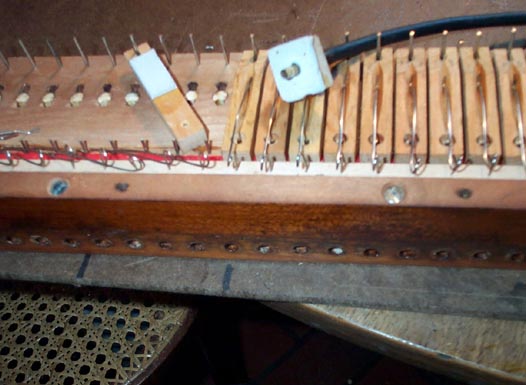
The touchbox was attached to the keybed with just a couple of angle brackets; probably not original. The height of the touchbox above the rear ends of the key levers is critical, so I made two new support blocks. These have the fixing screws, as well as two #10 machine screws as jacks, with which one can adjust the height of the box precisely, and make sure that all four corners are firmly supported. The new elbows are shown inserted with thick shellac.
The next step is to level the rear ends of the key levers, so they all start out at approximately the same height. The level of the front ends of the key levers is fixed by the fact that they rest against the "key level" cloth pad under the keybed, held up by the key springs. So the far ends of the levers can be raised or lowered by adjusting the fulcrum screw. As can be seen below, if the key dips 3/8", the ends of the levers travel only 3/16", and a movement of the lever center point of only 3/32" is enough to move the lever end through its whole range of motion; less than a full turn of the screw either way.

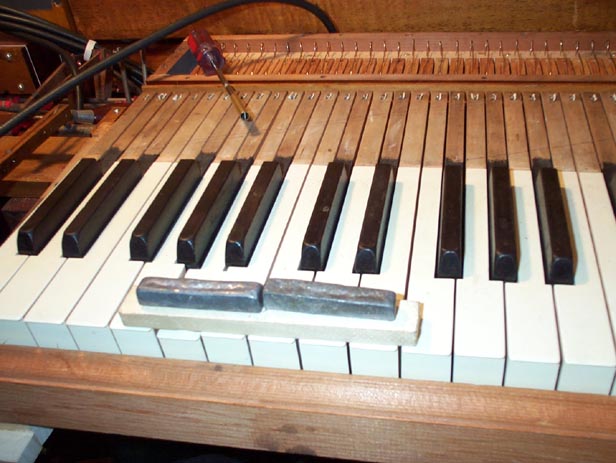
The felt pad above the center of the levers is soft, and only serves to keep the lever down in place, and prevent rattling. By starting with the lever only barely touching this pad, one can adjust the screw its full range either way, without the felt from being compressed enough to interfere with the movement. By trial and error, I discovered that the levers at rest should be 1/8" above the keybed supports. I put a piece of aluminum angle, supported at each end with a scrap of 1/8" aluminum bar, across the whole thing. (The picture of this procedure, way down behind, didn't come out.) Then I loosened each screw till all the levers showed light between their ends and the angle; then raised each one in turn, until each one just barely lifted the end of the angle and then back down. Sort of like adjusting the capstans in an upright piano.
Then the box was installed. By trial and error, with pallet sticks in only a few of the end valves, the box was jacked up until those valves tested closed, but opened when the key was pressed about half way down. Then the whole thing was firmly screwed down. A disadvantage of having made new pallet sticks without the tiny pouch leather seal rings is that some of the sticks might fall out while the box was turned right side up for insertion. Gumbands held the sticks in place for this. Later the gumbands were plucked up from the elbows with a tweezers. cut out, and discarded. Once the box is in place, the sticks can't fall out. Of course this means that the touchbox cannot be removed again without a lot of trouble, but this will not be a problem. Everything, including an individual pallet stick itself, can be accessed and removed if necessary, by taking off the top lid of the touchbox. But one difficulty became obvious; there is no room for a screwdriver to fit between the front of the touchbox and the back of the keyboard. So the 3/4" - 6 screws that fix the key retainer bar, were replaced by 1" - 6 screws with their heads soldered into 1/4" - 20 wing nuts. Now the keyboard can be opened to fix a misbehaving key without having to remove the touchbox or the entire keyboard. Actually the idea was inspired by an earlier model Orchestrelle I saw once, that used wing headed wood screws to hold parts of the case together.
To make the next iteration of the lever screw calibration, a little, weighted key dipper was made that depressed the key half way. The lid of the touchbox is removed, so the pallet movement can be observed. The screw was adjusted till the valve sucked open at about this point. Only a fraction of a turn of the screw either way was usually required. It proved handy to force fit a bit of tubing a little bigger than a #4 screw head, over the end of the screwdriver. One can not see the screws up under the back of the keybed, and this kept the screwdriver in place and centered on the screw. It is still awkward, working bent over to reach the screws.
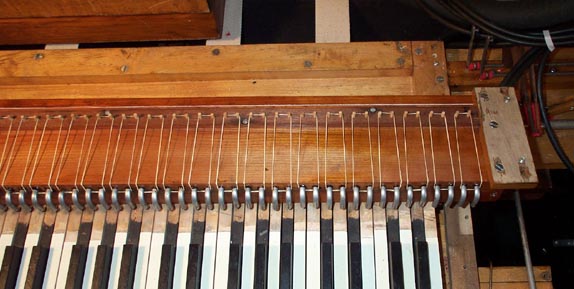
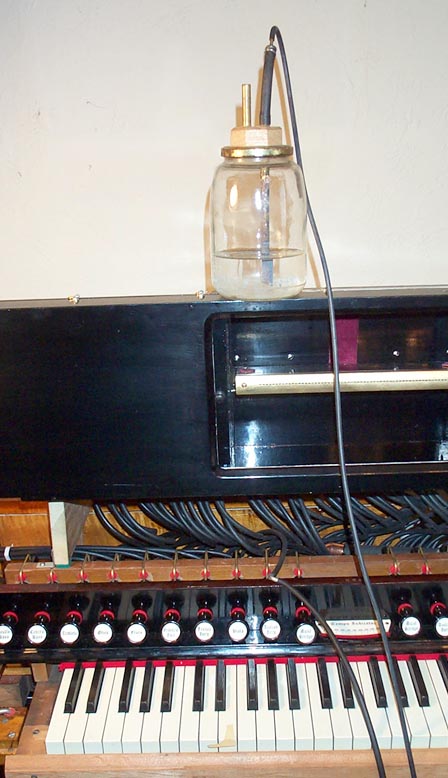
Now, skipping forward several chapters, for the next adjustment step. The stop rail is in place, and the spoolbox, with the primary pouchboard attached in back where you can't see it, has been temporarily installed and tubed up. The organ's wind has been connected to the touchbox. Now the manual valve pallet, the primary pouch and bleed, and the tracker bar port, are all in the completed "primary pneumatic circuit". But by removing the tube from the manifold bar at the bottom of the spoolbox, below where the path is teed to the pouch board and the tracker bar, only the pallet valve remains in the circuit. The tube from the touchbox was connected to player piano testing bubble jar. (Believe me, only put on the narrow top of the spoolbox for this picture!). It should blow bubbles only when the organ is pumped up and the key is depressed, but make no bubbles when the pallet is closed under pressure. (If you remember to dump out most of the water, so 2-1/4" WC can blow bubbles at all!). Most of the valves tested bubble free, but a few, especially near the center, still simmered when closed. One could feel a breeze from the tracker bar, and some of the primary pouches puffed up a little even when the note was not being played. Perhaps due to settling of the leather, or deflection downwards of the now fully loaded keybed frame. Luckily all these were cleared up by slightly loosening the adjusting screw; I didn't have to go back and open the touchbox to fix anything major. Now all the primary pouches stayed down unless deliberately inflated with the key.
I expect I will have to go back and make a final adjustment, once the organ is complete and making music, so the attack is uniform throughout. All the notes should begin to speak at about the same point in the key dip.