Chapter 5.4 - The Bass Chest Tertiary Valves, and Final Test
The pouches are backed with a red pressboard disc and a felt ring, which was reused on the new pouches. These pouches don't hit bottom in operation, the felt ring must have been just a guide to control the dishing depth during assembly. This production enhancing trick is used throughout the organ. After the pouch is laid and dished, screw in a stemwire in the center hole, and pull out, to insure that the leather is clear of any adhesion to the sides of the well.
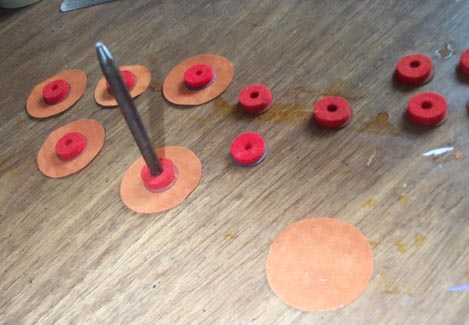
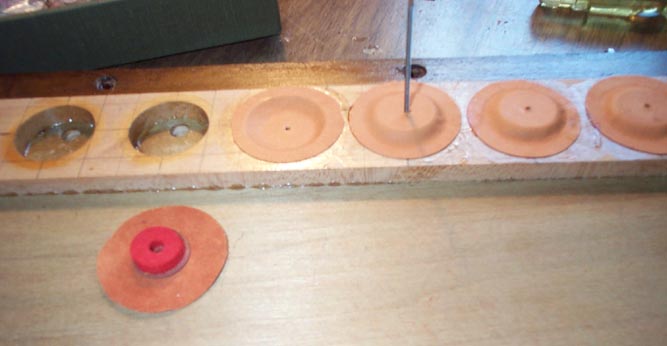
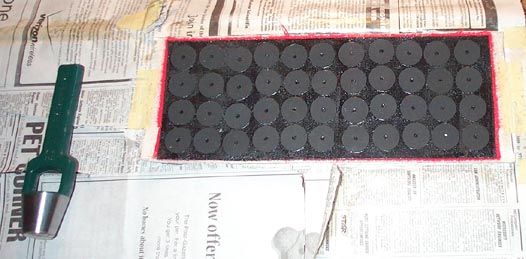
These valves are a composite of valve leather, either rather stiff brown felt or thick bushing cloth, cowhide to get a good grip on the stemwire threads, and a backing washer, 25/32" in diameter. Having no stiff brown felt, I used thick key bushing cloth. There is no 25/32" punch, but a 20 mm is just a few mills over, When the composite is dried, punch the discs out through all the layers, using the new backup washer as a guide. The the hole in the center is shear-punched with a flat ended steel wire on the boxwood punching block. The the hole is "tapped" with a stemwire.
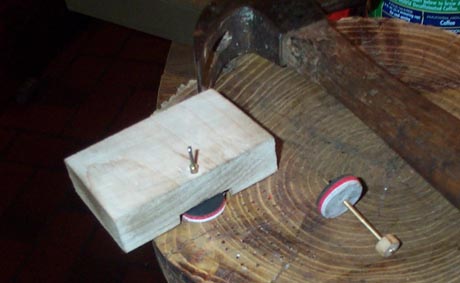
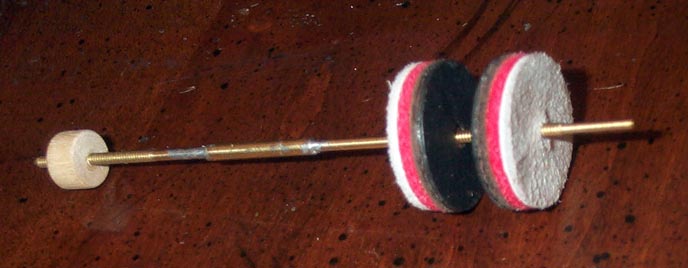
The new stemwires I ordered to match those used throughout the organ are #14 (0.064") brass wire with a 7/8" long rolled thread on one end. and a 3/8" long reduced diameter, 0.050", tip extending beyond the thread. Apparently the reason for the reduced diameter tip is that it slides into the punched hole very vertically, so when the stem is threaded into the disc, the disc surface ends up a right angles to the stem axis. The 1/8" clearance hole in the backup washer allows a certain amount of valve wobble. But the pneumatic forces that assure a tight seal are small, so it is desirable to start with the discs as flat as possible to the valve hole. There are only 13 of these stems which are threaded 7/8" at both ends (these are the only valves that are pulled from above instead of pushed from below). So to avoid another setup charge at the stemwire vendor, I soldered two wires together using a bit of 1/16" ID hobby shop tubing, and cut off the tip on the upper end. The upper end of the wire is screwed into a wooden button glued to the pouch. Modern buttons (Schaff #541) are drilled 0.072" for contemporary #13 wire goods, so the holes were too loose. A 3/16" wide strip of paper, coated with mucilage, and pulled through the hole just like a bushing, fixed that.
With the spreader board (with the pouches) off, the valve discs are inserted into the cavity from the front, and speared with the stemwires inserted through the guide from the top. The wires are spun to screw the discs into their approximate position. Then the pouch board is attached and gradually lowered into place while the upper ends of the wires are screwed into the already glued on buttons. This takes a while, moving from valve to valve, but eventually the pouchboard can be firmly screwed down. Now, by turning the stemwire in its button, or by turning the valve discs with the fingertip, everything can be adjusted to the correct place. I have no idea of the correct valve gap, so I guessed for the time being. Later, the points of the wires will be clipped off, to allow the reeds (barely visible at the back) to be pulled.
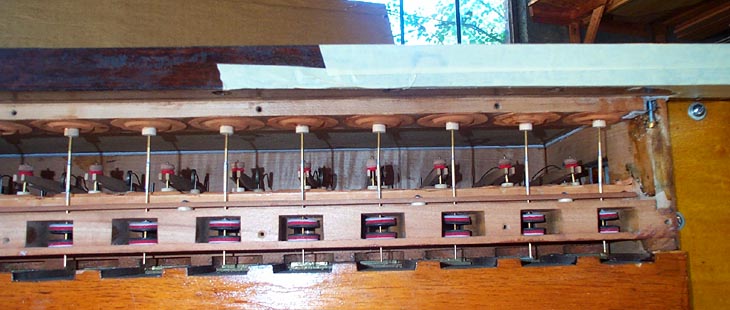
Not a great design, as far as accessibility is concerned.
But there is barely enough room to lift off the pallet springs with a hooked
wire, and pull the pallets back, up, and out between the stemwires, if
need be, without taking the whole thing apart.
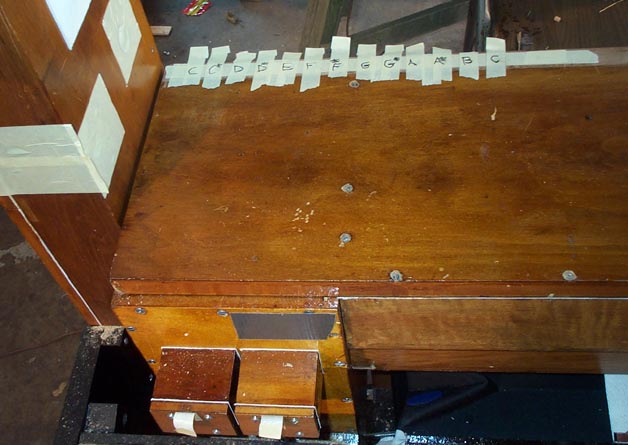
After everything is buttoned up, the bass notes
are tested again with the valves in place. The organ is pumped up,
and the stop primary (the one on the right) is actuated by untaping its
tube hole, to pressurize the bass chest. The lettered tapes cover
the openings that normally lead to the main secondary valve channels in
the backplane. By opening these channels, the notes can be "played",
since this vents the pouch just like the secondary circuit would do.
The note begins to play as soon as the tape is lofted. But since
there is no secondary valve to repressurize the pouch after the end of
the note, it takes a couple of seconds for the note to stop when the tape
is replaced. The pouch has to be repressurized only by wind that
seeps through it from the chest. But it did work, showing that the
valves moved without bottoming the pouches, and everything was functional.